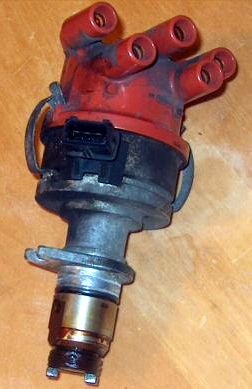
This tutorial page is a 2009 archived cache from the Internet Archive. All content and images are the property of the original content creator at 900saab.com Saab 900 distributor rebuild, internal oil seal fix, repair, oil in distributor, DIY, how-to, distributor oil leak. | |||
|
|||
| A common problem with the non-turbo models is
oil leaking from inside the distributor as the vehicle ages. This
is due to oil leaking past the distributor's internal oil seal, either
due to wear of the seal or hardening of the seal's elastomer.
Until now, to remedy the leak, the distributor had to be replaced,
regardless of it's operational condition. This is how I went about
resealing and overhauling my distributor.
|
| To replace the seal, the distributor must be
disassembled fully. What makes this a tough task is removal of the
pin holding the drive gear on the shaft.
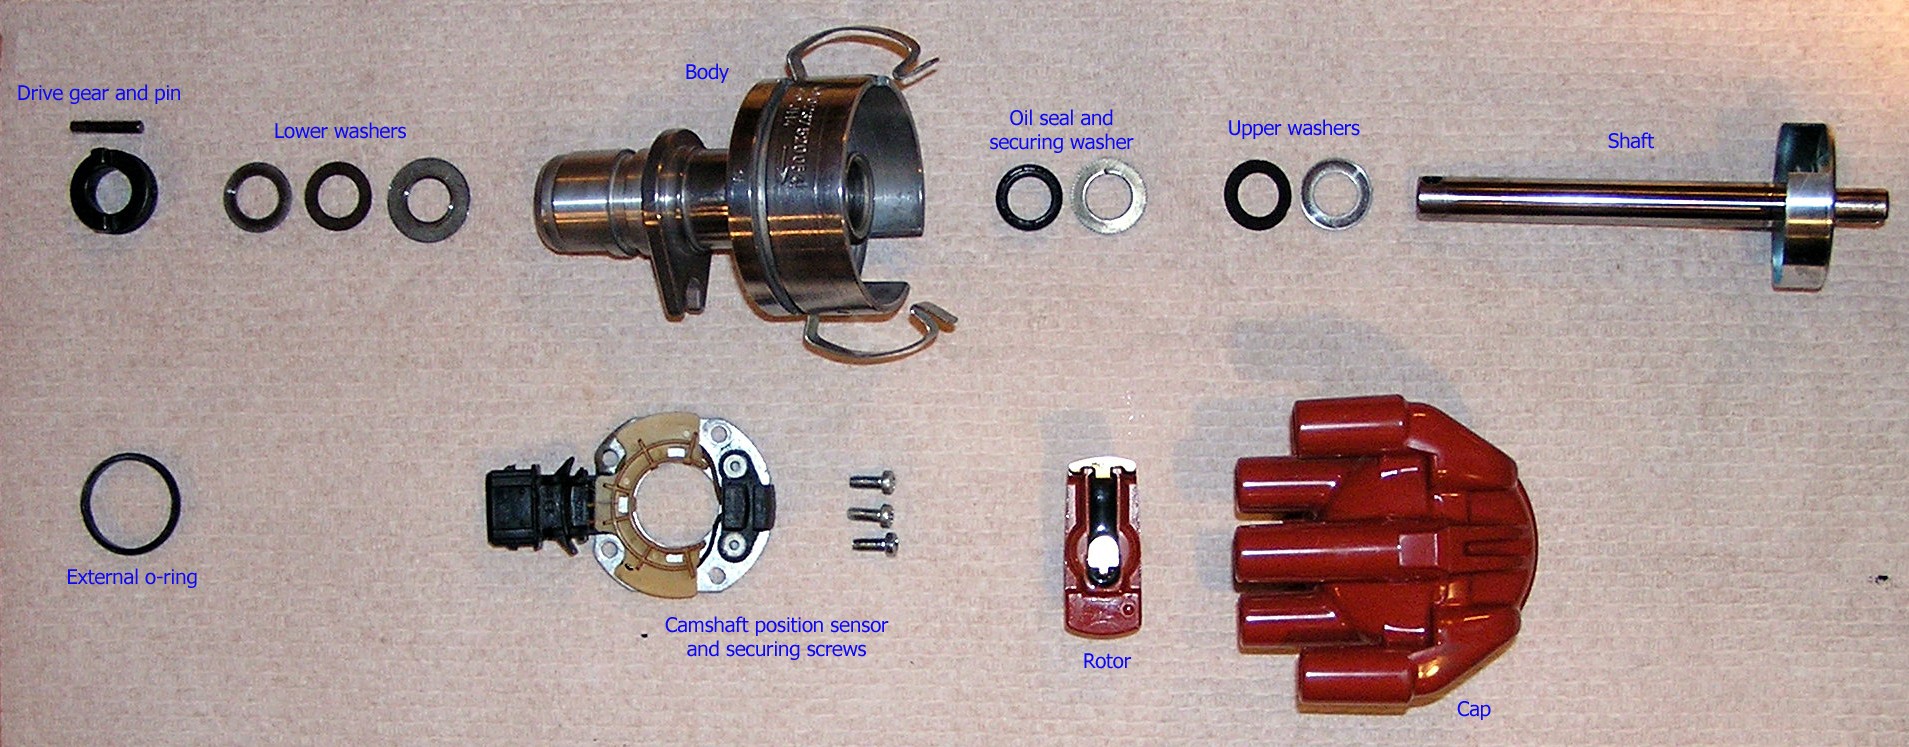
To remove this gear, I used a smaller diameter roll-pin to press out the pin in the distributor. To do this, I placed a small socket on the "catch" side of the pin and placed the roll-pin on the opposite side; I then used my vise to slowly and carefully push the pin out. I would recommend against driving the pin out as you will likely damage the aluminum body of the distributor. Also, be sure to mark the orientation of the drive-gear to the shaft to ensure proper orientation upon reassembly. The prongs on the drive gear are offset from center and must be reassembled in the same orientation. Mark the orientation on the bottom of the distributor shaft before disassembly. When the pin is free, the center shaft should slide out. There will be a series of small washers; keep these in order and don't lose any. Once the shaft is free, remove the 3 screws securing the camshaft position sensor and set it aside. Below the sensor, you will see a washer with serrated edges; carefully pry this free with a small screwdriver. Beneath this washer, you'll find the seal. This is what were after! Give all parts a thorough cleaning in degreaser and ensure everything is in good condition. Here is the disassembled/cleaned distributor (click on the picture to see a high-resolution version):
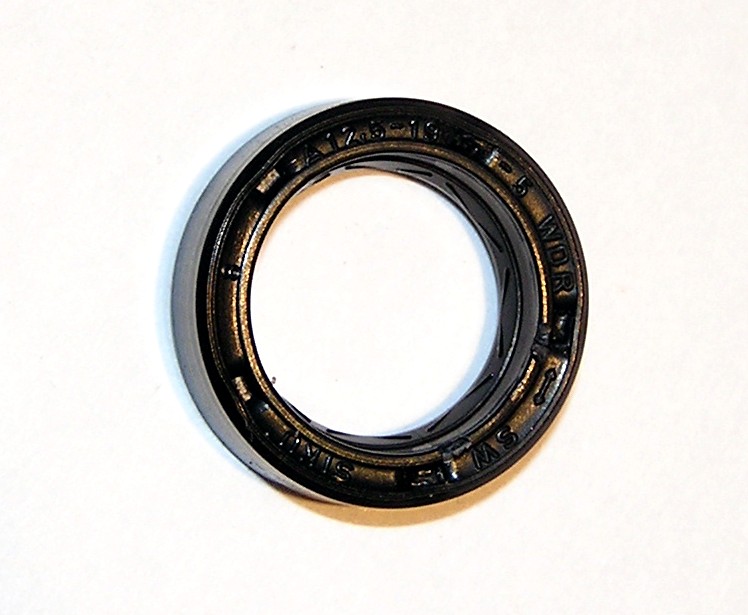
Images of the front and backside of the original seal are provided below: Front:
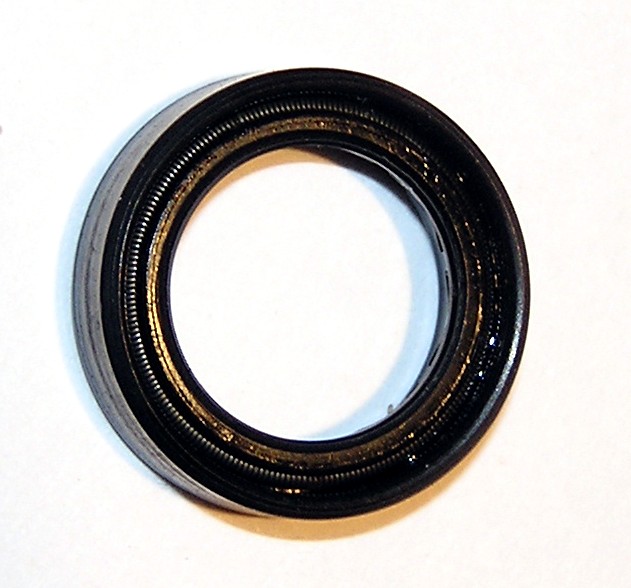
Back:
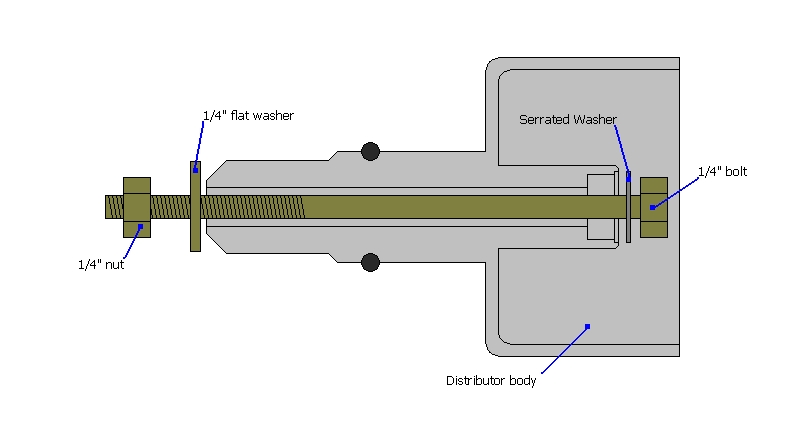
The original oil seal is a spring seal made by SIKU and has the following dimensions: 12.5 mm ID, 19 mm OD and 5mm thickness. As removed, my seal had hardened to the point that I couldn't flex it with my fingernail; this hardening appears to be the cause for oil leakage. Sourcing a replacement seal is nearly impossible; both SKF and KOK specify a 12.5x19x5 oil seal, however, I haven't been able to provide a supplier for either. After a substantial search, I did find a seal that should work: Boca Bearings sells a 12mm x 19mm x 5mm oil seal for under $7. The ID of this replacement seal is smaller, however, only 0.25mm in radius; this shouldn't present a problem and may even help provide a seal if your shaft is substantially worn. NOTE: The oil seal in our Bosch distributor is the same seal used in the distributor of the MK2 Volkswagen Golf and Jetta; if the above supplier becomes unavailable, you may be able to source a replacement seal that is specified for the Volkswagen distributor. Other seals that fit are: NAPA part number 4912, SKF #4702, and Honda #91206-KV3-003. Once you have the replacement seal, you'll want to press it into place and then reinstall the serrated washer. I tried tapping the serrated washer into the distributor body using a small peen and cracked the aluminum body; I'd recommend against doing this. Instead, use a bolt and nut to press-in the serrated washer as illustrated:
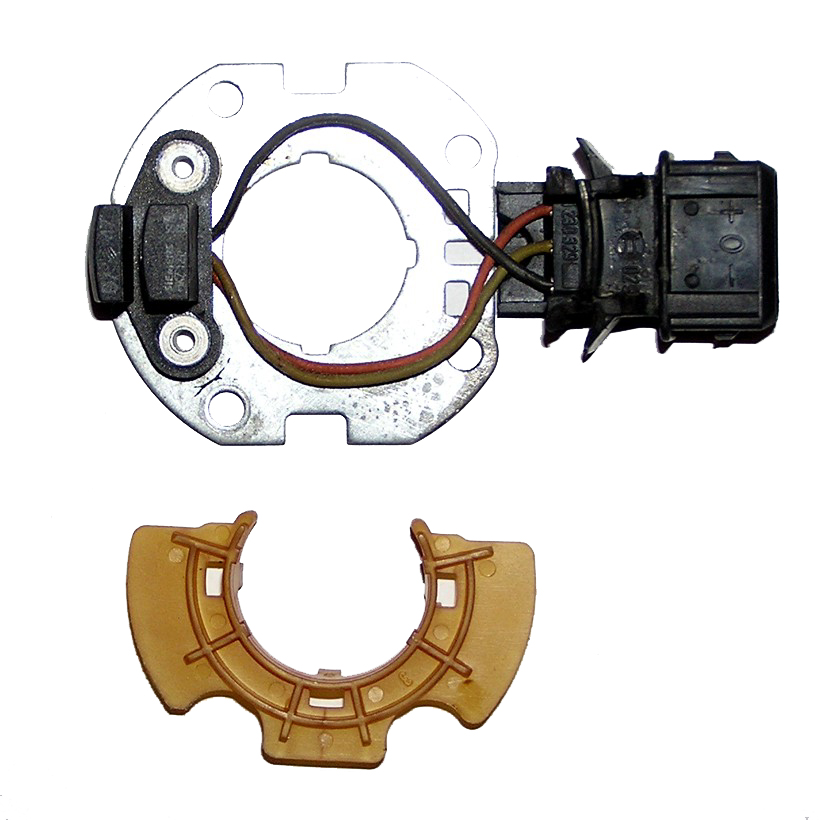
With the serrated washer in place, reinstall the distributor as you disassembled it. If you tear any of the fiberboard washers during reassembly, make yourself new ones using paper gasket material. Cut them out, oil them and install them. Do not assemble the distributor without the fiberboard washers as these serve to hold lubrication for the sliding washers. Camshaft Position Sensor If your camshaft position sensor has failed and you've ruled out oil contamination and poor grounding as the cluprit, the sensor should be replaced. That being said, I have been unable to source a replacement sensor. No worries, however, as you can rebuild the sensor yourself. Here is the sensor, with it's protective plate sat aside:
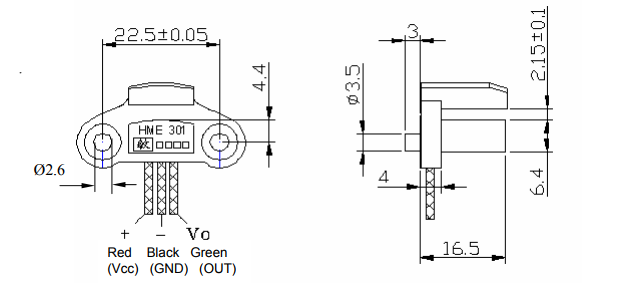
This sensor is VERY simple. It consists of a Siemens HKZ 121 Hall Effect sensor riveted to a grounding plate and attached to a Bosch 3-wire connector. To rebuild the CPS, drill out the rivets securing the HKZ 121 to the grounding plate and replace with a new sensor. I have been unable to find a supplier for the Siemen's sensor; ChenYang does make an aftermarket (Chinese) version of the HKZ121 sensor; this replacement is model number CYHME301. This sensor is readily available online for under $20. When installing the ChenYang sensor, note that the wiring order will differ from the original Siemens unit. Connect the ChenYang sensor using wiring color instead; red to red, black to black and green to green. The ChenYang wiring diagram is provided below, courtesy of the ChenYang PDF linked above.
|